Tuesday, May 31, 2011

Monday Challenge #10 - Cute Critters

Hello blogger friends. Here is a card I made for the Monday challenge over at My Craft Spot. This weeks challenge is to make something with a cute critter on it. I used my Gypsy and the Four Legged Friend cartridge.
Cricut Cartridge: Four Legged Friend (dog) and DonJuan for sentiment
Cuttlebug Embossing Folder: Distressed Stripes
Boarder Punch: EK Success
Other Stuff: Grommets, stickles, ink chalk and lots of regular chalk

Thanks for looking and have a wonderful week.

God bless you all,
Kellie

Sunday, May 29, 2011

Throwback Thursday Challenge Green and Yellow

Good morning bloggers and happy Sunday. Here is a card that I made for a challenge over at My Creative Time. This challenge is to make a card using an older cartridge of your choice and incorporate the colors green and yellow into it. Here is the card that I came up with using the Walk in My Garden cartridge.

Card Size: A2
Cartridge: Walk in My Garden
Bee, Bee Hive, Corn Flower and Daisy cut at 1.25"
Cuttlebug Folder: Swiss Dots
Stickles: Black Diamond
Tim Holtz Distress Ink: crushed olive & wild honey
Sentiment and Ink: Studio G

I used my Gypsy for this project. The green squares were cut at 1 3/4" x 1 3/4" and the sentiment frame was cut at 3 1/2" x 1" and 3 1/4" x 3/4" for the yellow. I enjoyed making this card for this challenge. Head on over to My Creative Time to have a look at this weeks challenge.

God Bless you all,
Kellie

Saturday, May 28, 2011

My Craft Room

Hello bloggers, if your like me I like to see what every ones craft rooms or craft spots look like. I thought I would show you mine. I have 2 different areas right now that I have craft stuff in.
When I first got my Cricut my husband built me this craft cart, which is very handy. I love it. Then I bought the cart to the right at Bed Bath and Beyond for $20.00 (good deal).

Both sides of the cart flip up to make extra room to work. Great for mats and sitting my Gypsy on when using it. I then bought the milk crates at WalMart for $3 each and hung file folders in them to sort my papers. My Cuttlebug folders are in the very bottom right plastic container. My Cuttlebug is in the next shelf with some Tim Holtz die cuts. Then next my created cards in the Rubber Maid container. On the top shelf I have my paper cutters and Martha Stewart Score Board. The drawer holds miscellaneous items like my Cricut tools, extra blades, tape for my ATG gun and I keep my Gypsy there when not in use.
The little cart that is to the right holds my scraps and my Cricut cartridges. I only have 18 carts so far so it works for now. I suppose in the future I may out grow this drawer and have to move them. These carts sit in my dinning room which we never use since my sons have grown and moved out. My husband also uses the Cricut to cut his vinyl so I think the Expression is going to stay in this location for a while. Next stop my craft room.

Here is what my craft room looks like from the door. It's not very big I think my husband said it was 10' x 9". But it's mine and I love it.

To the left is my sewing machine that sits on my husbands grandmothers old sewing cabinet. My great grandmothers hand sewn quilt is hung on the wall. The plastic stacked drawers hold some of my yarn. The plastic drawers will soon be replaced by wire drawers from Ikea.
To the right of that under my window is my table where I cut my fabric. You can see the purse I knit and felted this week. I just need to attach my handle and it will be done. See my cute Yorkie stuffed animal. I have 2 Yorkies and when I saw this stuffed one I just had to have it.
Turning right again you can see the wonderful Ikea draws my husband bought me for my yarn. Love all my yarn! Next to that is my little antique desk and chair that belonged to my husbands family. I do card crafting there and take my card pictures there. I made the board above my desk with a foan board covered with fabric and ribbon. Above that I have a runner light (bought from Ikea) that puts out a ton of light for crafting.

To the right of my crafting desk you can see the new Jetmax Cubes I purchased last weekend at a Craft Warehouse sale. I got 6 of them and I put them all together by myself. I did have my husband hang the Ribbon organizers because I was afraid if I put them up they would fall down. Above you can see a shelf we bought at Ikea (my husband hung it) that hold knitting books and stuff.
I got all my stuff on them and love the way they look. I can't believe how much crafting stuff these little babies will hold.
This is actually 4 Jetmax cubes. Each cube came with only 1 drawer so I put all the drawers on the bottom and bought some plastic containers at the Dollar Tree to put in the top spaces. The first two drawers to the left hold all my brads, stickers, gems and embellishment items. The third drawer holds my punches (Martha Stewart punches are up on my ribbon shelf). The last drawer on the right holds my embossing heat gun and hot glue gun. Can you see my cute little Cricut Create. I use this when I do not need to use the Expression. Next to my Create is my Cinch binding tool which I also love. We'll that about wraps it up. I hope you enjoyed the tour of my craft areas.

God Bless you all,
Kellie

Cards From Before

Good Morning fellow bloggers. I wanted to share some cards that I made when I first got my Cricut. My husband bought it for me the day after Black Friday 2010. We were out and about and he pulled up in front of Joann's. I asked what he was doing and he said to me "Didn't you want that cutter thing you were showing me", so funny he didn't even know the name of it. I couldn't pass up his offer, so that's how my Expression entered our household. All cards are A2 in size and are from Creat a Critter, the 1st cartridge I ever bought, I still love this cartridge.
I did use Glossy Accents, Stickles and brads to add a little extra to them. I used a flocking on the little lamb. Hope you enjoyed.

God Bless you all,
Kellie

Thursday, May 26, 2011

More Pinwheel Cards

Good morning bloggers, Yes I think I'm addicted to these easy to make cute cards. Had to make a couple more yesterday. Here's a quick view. Have a marvelous day.
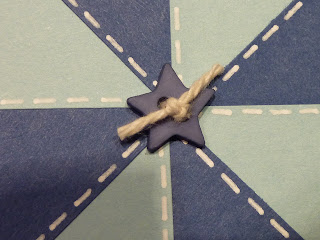
I found these cute buttons in my stash. I think they worked out quite well. On these two cards I used Swiss Dots and Divine Swirls embossing folders. Used my Gypsy and Accent Essentials to make the tags for the card above and below.
I used Divine Swirls and Polka Dots on these two cards.

God Bless you all,
Kellie

Tuesday, May 24, 2011

Pinwheel Card

Hello Bloggers. When I was surfing the blog today I saw this really pretty Pinwheel card and just had to make one. I saw it on Dreaming About Rubber Stamps. Please check out  Darlenes site for all the  dimensions on this card and a tutorial on how to construct it.

Here is a closer view of the pinwheel. I used Tim Holtz distressing ink in 'black soot' around everything on this card.

Criut Cartridges: Paisley -  for love you phrase
I used the Cricut markers in place of the blade for the phrase
Gypsy Font - for back ground oval cut at 2.51W x 1.25H
the front oval is at 2W x 1.4H
Paper: K&Company, Black & Ivory Designer

I did use my Gypsy to cut the ovals and phrase.

I always add a bit of coordinating paper to the inside of my cards. I do leave them blank to write on later.

On the back I always write my name, year and blog address. If anyone knows where I can have a personal stamp of this made please leave me a comment.

God Bless you all,
Kellie

Gift for Mom

Hello fellow bloggers, I hope everyone had a wonderful day. When I was out and about with my mom on Saturday shopping at different craft stores she found a small bottle of Skittles on clearance that were clear in color. We looked around but couldn't find any more. I knew that I had seven different colors at home (including clear) but didn't say anything to her. So yesterday I went to Joann's and bought a small bead organizer and put a little of my Skittles in each container for her. I made a little bag and sent them to her via our "Man Mail". We own our own business so my husband and father work together every day so we send each other stuff through them and call it our "Man Mail".  Well here it is, I think the frog turned out so cute.
The Skittle colors are Peal White, Pink, Green, Blue, Purple and Black. I threw in some Bobble Eyes too.
Cricut Cartridge: Paisley
Image: Frog2 on page 36 cut at 2 1/2"
Pink Stickles
Bobble Eyes with lashes
Don't you just love those eyes. My husband found those Bobble Eyes with lashes at Joann's one day for me. I love how she turned out. I used my Gypsy for this frog so I could hide some cut out areas on her. I only wanted her mouth cut out and then cut out the heart image.

God Bless you all,
Kellie

Monday, May 23, 2011

Owl Shaped Card

Good morning fellow bloggers. I made this card to participate in my first ever blog challenge. This is for the Monday Challenge #9 - Shape Card that is at My Craft Spot. So go on over to My Craft Spot and check out the challenge.
I used my Gypsy to create this card with the Gypsy Wanderings cartridge. I used the Owl shadow feature at 5.00H x 3.92W and duplicated, flipped it and then welded it together to make the card base. The Owl is at 5.00H x 3.63W and the shadow directly behind the Owl is at 4.50 x 3.53. I sprayed some gold spritz on the dark pink base and then faux stitched around everything. Then I added some buttons with cream twine.

God Bless you all,
Kellie  

Thank You Bloggers

I am still very new to this blogging thing. Not new to blog stalking because I have done that for quite some time, but I have only had my own blog for a couple of weeks now. I have had over 150 views in those couple of weeks and I just wanted to say Thank You to all who viewed.
Cricut Cartridges: Plantin SchoolBook - Award back ground page 81 cut at 5 1/2" x 4"
                            Accent Essentials - Accent20 (hearts) page 51 cut at 1.50H x 1.63W
                            Gypsy Wanderings: on my Gypsy - for phrase cut at 1.40H x 3.12W
Making Memories: Corner Chomper 1/2"

I used my Gypsy to do this layout which has the Gypsy Wanderings cartridge on it. I'm not sure if you can purchase this cartridge, I'm thinking that it was an exclusive to the Gypsy only. If you don't have a Gypsy you could use another font. Hope you enjoyed.

God Bless you all,
Kellie

Saturday, May 21, 2011

Card From My Mom

Good morning blogger friends. I have to share a card that my mom made me. She is very new to this and already making terrific cards. I love sunflowers and she made me this beautiful card just because she loves me. Isn't life grand. She used the Country Life cartridge and it looks like she cut it at 3". She saw this layout on YouTube, sorry I don't know who's idea this was but thank you. This card has 3 layers to it. I really like it and will do a card with this layout myself and provide you with all with the dimensions. Today is Mother Daughter Tea at my sisters church so it will be a fun day. Have a blessed Saturday everyone.
This is what it looks like when you open the first flap which has the sunflowers on it. Then you can fold it open to yet a third layer as shown in the picture below.

Cricut Cartridge: Country Life
Image: WldFlwrs on page 73 cut at 3"

God Bless you all,
Kellie

Thursday, May 19, 2011

Princess Wand

Hello blogger friends. I was blessed with 2 wonderful boys who are now grown and out of the house. Having never had a daughter I have to make girly things for myself. When I saw the Magic Wand or as I like to call it a Princess Wand in the Once Upon a Princess cartridge I just had to make it. Boy was it a hard bugger to make and half way through had double thoughts. Okay it wasn't that bad but I did have to make the wand handle 2 times. Thank God for my Gypsy because I could hide all the other images and just cut out the handle. Where would I be without my Gypsy.
Lots of pieces to have to layer just for a wand oops Princess Wand. I used Perfect Pearls on everything but the handle before I glued it together.

You can kind of see how they inter lock to form four points. I found this part a bit of a challenge. But that's just me.  And now for the bottom of the handle. It is also put together in an inter locking method which yes I found challenging. You can kind of see the shimmer of the Perfect Pearls on the bottom of the wand. After I was done I used Scotch quick dry adhesive and applied it at the joint areas just to give it a little strength.

Cricut Cartridge: Once Upon a Princess
Image: MagcWand on page 69 cut at 6 1/4" (8 1/2 x 11) paper
Ranger Perfect Pearls

I do like how it turned out and will display it in my craft room.

God Bless you all,
Kellie

Wednesday, May 18, 2011

Mother Daughter Tea Gift Bags

Good afternoon fellow bloggers. About 6 posts ago I shared with you the name tags that I had made for Mother Daughter Tea coming up this Saturday at my sisters church. She has a table and is in charge of decorating it, so she came over today and we made cute gift bags to share with everyone sitting at her table. We are going to fill them little goodies (sweet treats) and each guest will then be able to take theirs home. How fun is that. I used a little bag from Once Upon a Princess cartridge.
Cricut Cartridge: Once Upon a Princess
Image: GiftBag1 on page 64
Paper: From Craft Warehouse bought in a bulk pack

The paper is 8 1/2" x 11" card stock so when I used my Cricut I used the Fit to Size button and the bags came out at 3 3/4"H x 3 1/4"W x 1 1/2"D. Now you could make these a little bigger if you were to use 12" x 12" paper. We thought that this was a good size and just went with it. I'll try to take pictures of the Mother Daughter Tea and if any of them turn out okay then I'll post it on Monday.

God Bless you all,
Kellie

Tuesday, May 17, 2011

No More Lost Pieces

No more lost bits. Ever cut out Cricut images that have a lot of little pieces. You remove them from your mat and then by the time you get to your work station you've lost one. I hate that when that happens. Well I've solved that problem. I had a small cutting mat from my quilting stuff that I never used and thought I could put it to good use. The mat is small and portable and measures 8 3/4" x 5 3/4".
Use Aleene's Tack-It Over & Over. Mix it with water (half and half) and use a sponge brush to apply it all over the face of the board. I did this a couple of times to make it real sticky. Let it dry between coats. Make sure and use a disposable container to mix this in. You can put the lid on and use it again when the mat is no longer sticky. I mixed 1 TBS Aleene's to 1 TBS water.
This mat is really sticky and you won't loose those little pieces any more.
CAUTION - Once this is applied to your mat I don't know if you can remove it, so please do not use it on a mat that you want to reuse for cutting fabric or other items on again in the future.

God Bless,
Kellie

Monday, May 16, 2011

Booties For Charity

Thought I would share some of the booties that I maded for a Premie Charity. I've got quite a few made, I think about 15-20 of them. I had better take them in so they can be put to good use.
I take these to my local yarn store and they distribute them to our hospitals.

God Bless,
Kellie